
Enamel pins are no doubt one of the hottest trends that penetrate many aspects of life. They are used as a powerful promotional tool and a personal decoration to express beliefs and characters. Since a lot of people are curious about enamel pins designs. Today in this post, we will uncover the secrets about how to make enamel pins successfully.
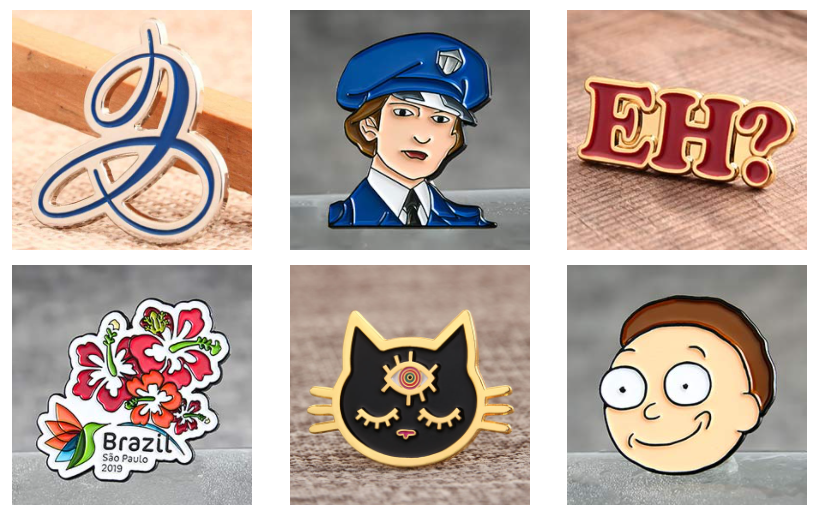
Ok, you have selected the one you like best. So are you wondering how can I make these lapel pins? In this post, we will give you’re an ultimate guide on how to make enamel pins. Everything from determines your design to the process of creating pins is elaborated here! Follow us to learn how to make enamel pins step by step. If you are a video lover, watch the video about how to make enamel pins.
How To Make Enamel Pins
Pre- Creation
So you want to make your own pins and you’ve got some splendid pin ideas which you think would be a pity if you don’t make them into pins. Great, now you are at the doorstep of how to make enamel pins process.
Before you choose a trustable supplier to make your enamel pins, here is something you need to decide before submitting your order.
- Determine Your Pin Designs
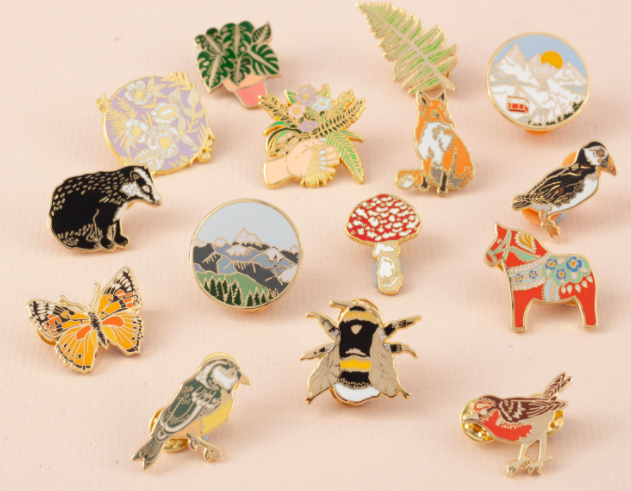
It is perfect that you already have a clear idea about your pin design. It makes things much simpler. You can directly submit your design to the lapel pin manufacturer that you prefer and leave the rest of the work to them.
Don’t panic if you don’t have any idea in mind. Here are some inspirations.
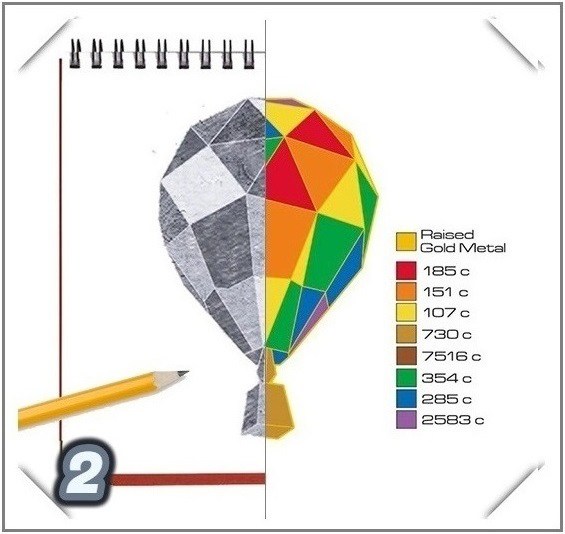
- Draw your design with your own hands
The simplest way to create your design is to hand draw the draft by yourself. Transfer what’s in your mind to the white paper with pens and then send it in PDF form.
Pro tip:
–Simplified design: Following the “less is more” principle for your first pin design. The size of the pin is usually 1-2 inches. Make sure each line of your design is clear without overlapping. Always choose simple and limited details when you draw your draft. Because the fewer lines and details you want for your pins, the more likely the design will be translated to a clear pin pattern.
–Use bold lines that can be translated to raised metal: Custom lapel pins are small masterpieces. In order to emphasize the design on the pins, it is vital to use some bold lines and vivid colors. Your pins can grasp people’s attention even from a distance.
- Draw your design with digital design software
There are much digital design software on the internet like Photoshop, GIMP and Illustrator. If you know your way around one of the tools, then drawing your pin design is a little case. This digital vector file is better than hand-drawn works because the pin supplier you entrusted may not have to adjust your design like the handwork.
- Determining your lapel pins craft
With your design in mind, now you need to decide what enamel process you want to choose.
There are six process options for our pins, but most pin manufacturers adhere to two traditional processes, hard enamel, and soft enamel pins. But, what’s the difference between these two crafts?
You may be confused about the difference between soft enamel pins and hard enamel pins. The image below provides a visual distinction.
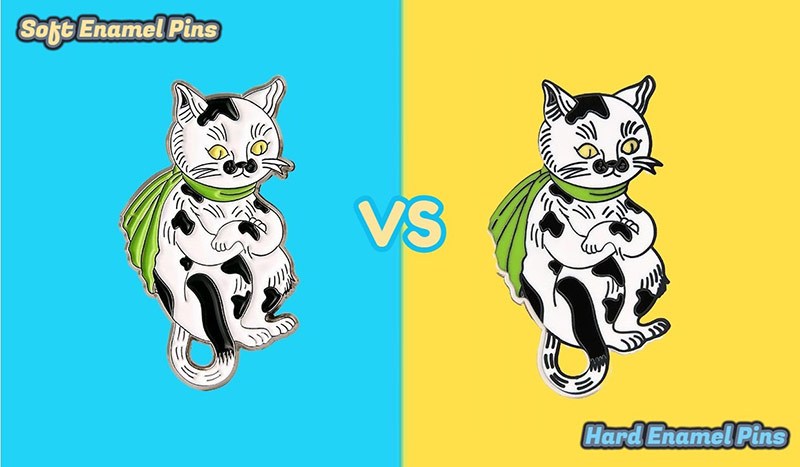
Soft VS Hard
–Soft Enamel Pins: It is the most popular types and the best option for beginners. It has raised metal lines and concave enamel, textures and a no-smooth surface. The color is much vivid and the color options are broader than hard enamel pins.
Unfortunately, soft enamel pins are easy to be scratched; that’s why a layer of epoxy will be added on the pin surface in some cases.

Soft Enamel Pins
–Hard Enamel Pins: Much durable than soft enamel pins and a good choice if you want them for long term use. The surface is repeatedly polished, with no texture and smooth surface. So it’s no surprise that they are more costly than other pin types. These are high-value pins that can be used on professional occasions.
 Hard Enamel Pins
In order to buy high quality Hard Enamel Pins, it is better for you to know more about How to Make Lapel Pins. This video provides detailed description about how to make hard enamel pins. Come and take a look.
How To Make Hard Enamel Pins
–Sandblast pins: It’s made of exactly the same metal as hard enamel pins or soft enamel pins, only with more added sandblasting colors and backgrounds! The raised areas of the badges are highly polished and have a shiny appearance, while the sunken areas are matte textured or sandblasted to increase contrast.
–Offset printed pins: The offset printed pins of this craft can be printed in a variety of complex colors and patterns. A coating of epoxy will be designed on top of the pins to seal what is printed inside.
–Antique pins: It is the most old-world charm pin. The recessed areas are darker, while the raised areas or lines are polished to a lighter metallic tone. Generally, enamel doesn’t apply to antique pins because this kind of custom pins do not need any color to decorate. Of course, you can add color to the concave for special needs.
–3D Cast or Cut out pins: The pin has a 3D pattern, creating a 3D look and feel. The raised part and the recessed part constitute this the overall effect of the three-dimensional feel. 3D pins are more vivid and beautiful, with a strong visual impact.
- Determining the right size
Although lapel pins can be designed and customized in different shapes and sizes, here are mainly six sizes that are frequently used: 0.5 inches, 0.75 inches, 1inch, 1.25 inch, 1.5 inches and 1.75 inches. If you want another size, please contact us, our designer will modify it for you without charge.

–Small size badges (0.5-1.25inch):
Advantages: More portable, easier to install on any surface; less material and lower cost.
Disadvantage: When designing, they usually don’t allow too much detail.
–Large size badges (1.25 inch or more)
Advantages: More detailed design is possible
Disadvantage: Because of the large size, it limits where they can be fixed. (You probably won’t see many people wearing 2-inch pins on lapels.)
(Attention: Price is closely related to size. The larger the size, the more materials, and labor are needed, so the higher the price. So if you want to try it out first, we suggest you place the order based on the size.)
- Send your lapel Pins Artwork File
Now that you have a clear production design PDF for starting pins production. You can provide your own design file or log in enamelpins.com and then send your design to us. Once we receive your file, our professional designers will start to transform your pattern into a digital proof and sent it back to you for further confirmation.
Here is some additional info you can send to the lapel pins manufacturer together you’re your design file.
- Choose the right finish
The pins’ plating is a metal protective film applied onto the pin metal. Here is a wide range of plating colors to choose from, among which the most frequently used ones are gold and silver. Of course, there are other finishes colors you can choose.
- Choose the right accessories
Pin back is as important as pin front. Once you have decided the design of the pin front, it’s time to determine the pin back. Well, different accessories have different purposes and applications. Everything is chosen according to one’s own needs. Here are six common types. If you have other preferred options not shown below, please contact us directly.
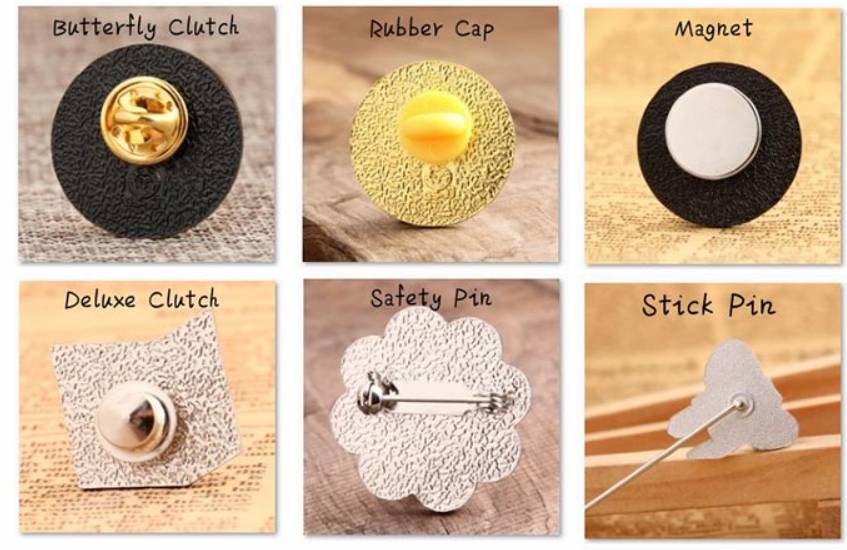
Accessories
On the back of the badge, besides the choice of accessories, there is also the choice of the effect on the back face. The back stamp can be embossed or debossed. See the article for more information:
- Choosing Outer Packaging
Now that the design and manufacture of the pins are completed, we need to choose a suitable package to wrap it up.
We provide four ways of our pin packing: Poly Bag, Velour Pouch, Plastic Box, and Velour Box. (Only standard plastic bags are free, and the other three packaging methods need to be purchased separately.)
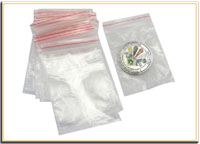
–Poly Bag
The most affordable option–All individual Poly Bag is STANDARD and FREE. This is suitable for giveaways, events if you want people to wear the pin on immediately. People get to see what’s inside directly and if your pin design is fun, they will accept it willingly and gladly.
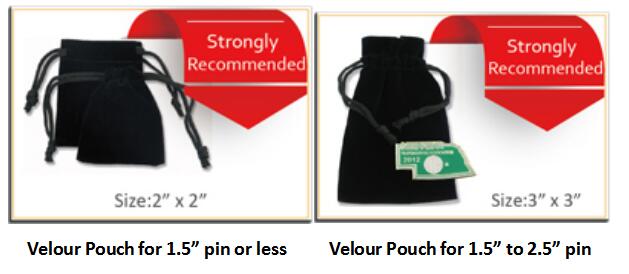
–Velour Pouch
If you want your custom pins to be displayed in an elegant way, a Velour Pouch is a perfect choice.
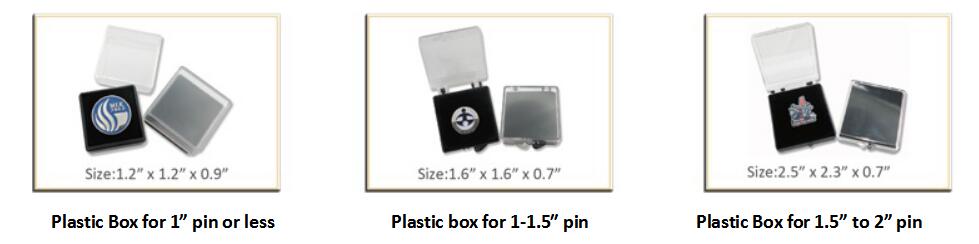
–Plastic Box
If you’re looking for a more affordable box-package, plastic Box is a perfect choice, because it’s the cheapest of all the boxes. And the transparent plastic cover makes your custom pins more visible.
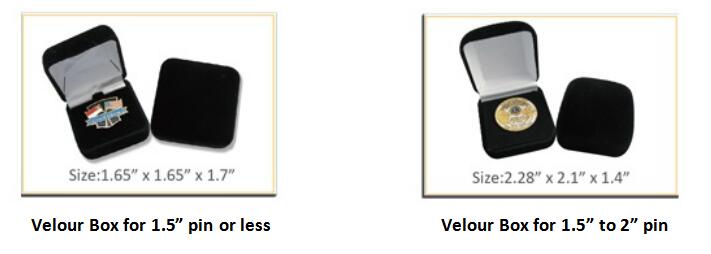
–Velour Box
The Velour Box is a package that allows your custom pins to be presented to your audience in an elegant and classic way.
–Back Cards
Surprise the receivers with a creative, tasteful packaging such as adding a customized back card. You can personalize the back cards into your business cards. Attaching your business cards onto your pins adds a personal yet professional touch to your pins.
- Determine quantity and place order
At this point, everything from the design to the packaging of a badge has been decided! Next, please tell us the quantity you need to order. We will give you the cheapest price according to the quantity you ordered.
- Additional info:Influencing factors of price
There are many factors influencing the price of Soft Enamel Pins, the main factors are the size of pins, the number of colors, the complexity of the design, the quantity and so on. The larger the size, the more colors, the more complex the design, the higher the price.
Here we explain the impact of quantity on price. It is not the less quantity the cheaper, because to create a pin, we need to create a mold first, so there is a mold fee at the beginning; and every pin in the future is a copy of the mold, so increasing the number sometimes means that the unit price of the pin decreases.
Here’s an illustration: All the processes selected are the same, but the quantity is different, the quantity is 50 and 100. It can be seen from the picture that the larger the quantity, the cheaper the unit price will be.

![]()
While-creation
What are Enamel Pins?
Enamel pins, also called lapel pins sometimes, are gaining increased popularity recently. This tiny metal pin with exquisite design has become a personalized accessory. Enamel pins are not confined to the lapel of a jacket. You can pin them onto anywhere you desire. Things like backpacks, designer bags, and baseball hats are perfect places to stick your enamel pins on.
Soft enamel pins and hard enamel pins are two categories of enamel pins.
How to make enamel pins?
Step1: Mold making.
Step2: Stamping metal production-
Step3: remove buffing burrs and polish.
Step4: Attachment: weld the Attachment selected by the customer to the back of each part.
Step5: Electroplating: use gold, silver or nickel on the metal surface to protect the base metal and provide a polished foundation for the next layer of coating
Step6: Coloring: every layer of color needs to be dried separately, and add the color at high temperature.
Step7: Cleaning and baking at high temperature.
Step8: Polishing again: put the metal products into the Polishing machine again. Make sure the color is on the same plane as the surrounding wire.
Step9: Quality inspection: pins will be sent to the Quality control department for manual inspection by highly skilled personnel.
Step10: Inspection and Package: the commonly used packaging is single plastic bag packaging, and the customer shall pack according to the customer’s requirements if required.
Once all the steps are completed, the pins will be shipped directly from the factory to the customer.
Video links: HOW TO MAKE ENAMEL PINS?
- Fast order processing service: after you fill in your contact information and upload your design requirements, we will provide you with free pin design digital proof within 24hours.
- Free design with unlimited revision: you can modify your design for free, and professional designers will help you modify it until it is exactly what you want.
- A variety of choices: there are a variety of process options to meet the different needs of customers.
- Custom lapel pins no minimum: the custom enamel pins no minimum amount of customized lapel pin to meet your choice of small orders.
- Free shipping: we provide free air transportation service and deliver the goods on time.
- High quality: perfect quality assurance and excellent after-sales service.
Our experienced customer service team and designers are dedicated to meet your needs. Whether you only have a sketch or just an idea, we can create the pin you want. There are a variety of process options. If you do not understand the process, you can consult our website online customer service. We look forward to working with you to create the perfect custom lapel pin for you.
Hopefully, this article has helped you gain some insight into custom pins. Please feel free to contact us if you have any questions.
This was a very interesting read and pretty accurate. I also am in the business of creating lapel pins, that too in bulk. If anyone is interested in buying visit the website for excellent lapel pins in a budget